WordPress’ menu system
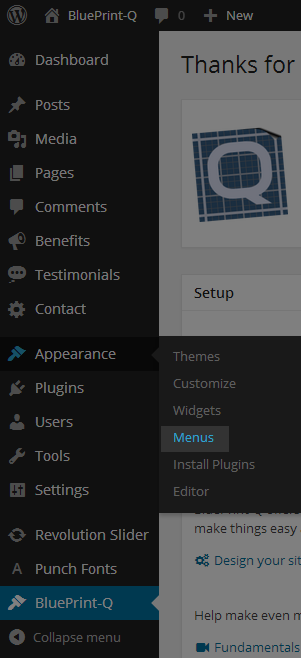
First step to create a menu – get to the WordPress Menus screen in the Admin Panel. Click Appearance >> Menus.
What’s it made of?
To create a new menu, click on the ‘create a new menu’ link (or it might look like an ‘add menu’ button).
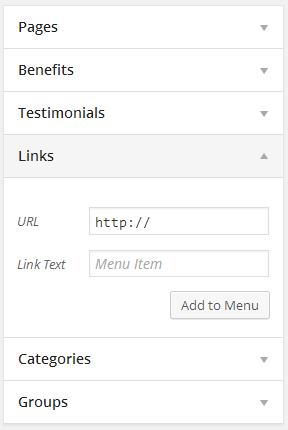
Figure out which menu items you want to display. On the left side of the screen, you will see an accordion control that can be expanded to select from existing posts, pages, benefits, etc. Choose what you like and click ‘Add to Menu’.
On the right side, you should see the items that you have added. You can drag and drop the items to change the display order or, if you play around a bit with it, you will notice outlines while dragging that allow you to indent an item under another item; effectively, making one item a child of another. In the screenshot, ‘Tutorials’ is a child of ‘Support’.
Within each item, there are a number of options that BluePrint-Q provides:
- Icon Markup: This is the HTML that corresponds to the icon that you want to display. To get the HTML, visit Font Awesome or Glyphicons.
- Divider: Add a visual separator between menu items.
- Header: Make the text non-selectable. Great for grouping a number of items together.
- Description: Appears under the Label.
With these options, you can make some really sweet menus. Keep in mind that Bootstrap supports a two-level menu system. You can have a parent level and a child level – but no grandchildren or beyond.
How to display
After you have defined your menus, you want to display them somewhere. You can do this in any of the following ways:
- Go to the BluePrint-Q Customizer. Expand the ‘Navigation bar’ section and select the menu you wish to show prominently on your page.
- Use the BluePrint-Q menu widget to select one of your menus. You can add widgets through the Customizer or through the Admin Panel Widgets screen. You might choose to put a menu in your footer or maybe in one of your sidebars – it’s up to you.
For more information about the Customizer, read up on adding structure to your site.


